How to Create Multiple Columns On Obsidian
One feature obsidian was missing recently has been filled by Cameron Robinson with a new plugin. The plugin is called ‘Multi-Column Markdown’. This plugin lets you create columns and structure your content in markdown format.
Instead of having a vertical linear format, this plugin helps you create different blocks of data that can be laid out horizontally. It extends the functionality of obsidian and you can use it to structure your note in creative ways.
In this article, I’ll show you how you create multiple columns in obsidian with the help of the ‘Multi-Column Markdown’ Plugin.
Installing the Plugin
The first step is to install the plugin from the obsidian community. I guess you already know this process. Here are the steps to follow:
-
Go to settings> plugins> Turn off safe Mode
-
Go to Browse Community Plugins
-
Search for the ‘Multi-column Markdown’ Plugin
-
Install it and then enable it
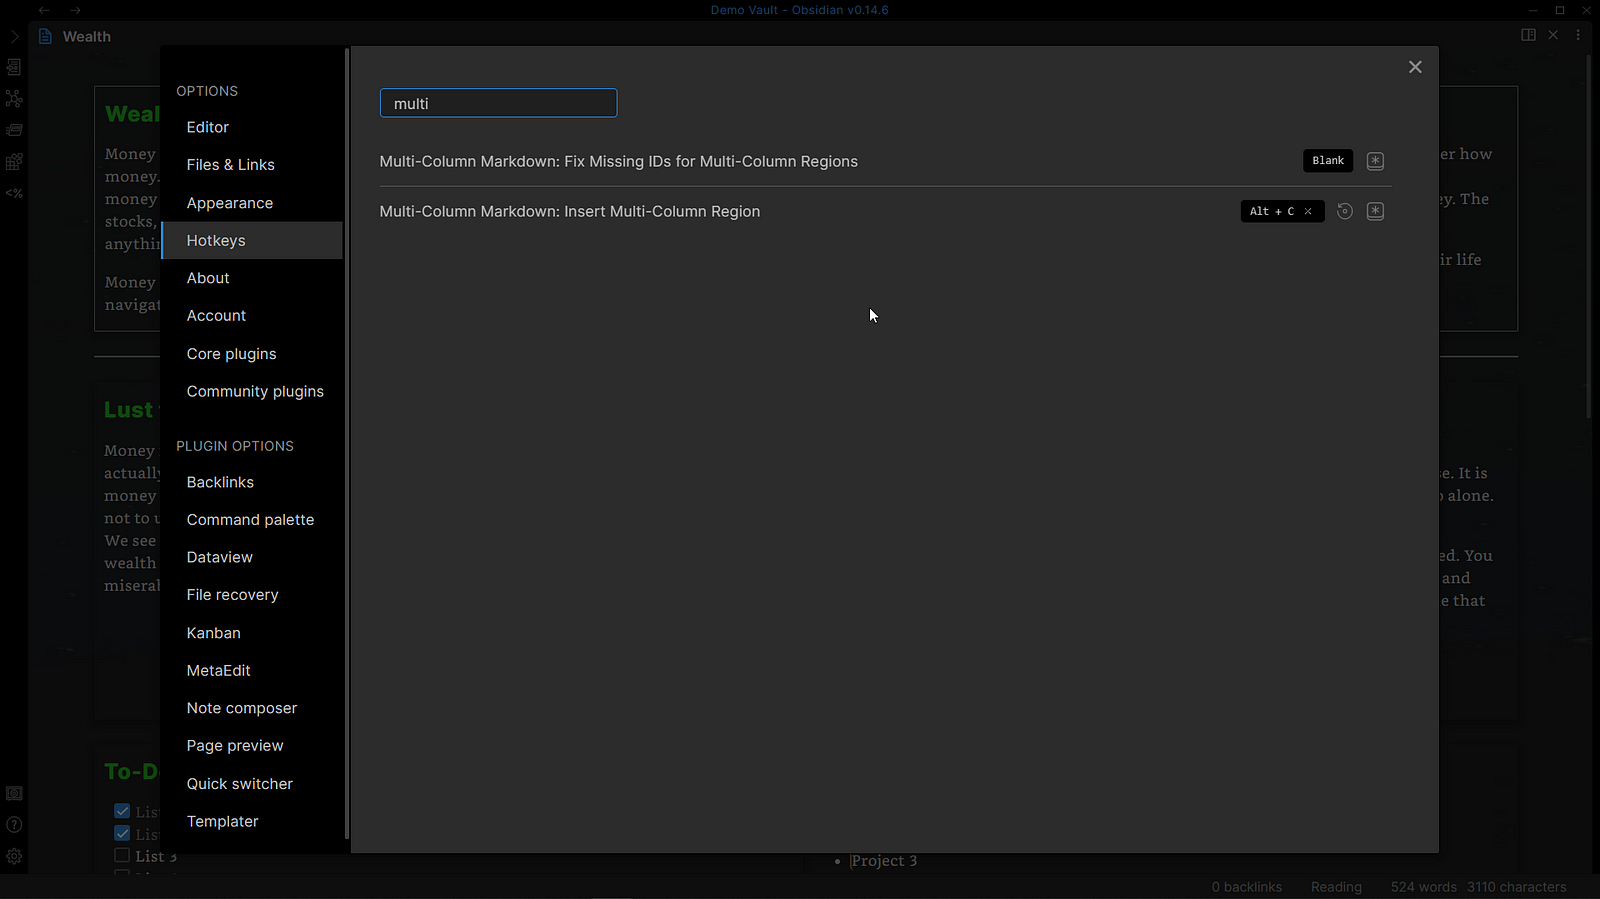
Setting up Hotkey
For frictionless workflow, we will set up a hotkey that will allow us to create multiple columns. Follow the steps:
-
Go to settings > hotkeys
-
Search for ‘multi’
-
Assign a suitable hotkey. I’m using Alt+C
Using the Multi-column markdown plugin
Go to a new file and use the hotkey that you assigned. You will see the following text appear:
=== multi-column-start: ID_xo96
```column-settings
Number of Columns: 2
Largest Column: standard
```

=== end-column

====== multi-column-end
Don’t worry if you are not a coding guy because I’m neither too. Let me explain what these all mean:
=== multi-column-start: It defines the start of a column

ID_xo96: This is an ID for the region which is generated automatically if you use the hotkey function. If you don’t, you will have to write the ID every time you create columns. The ID is used to differentiate between different regions and each ID must be unique.

```column-settings
Number of Columns: 2
Largest Column: standard
```: This is column settings block. This can be removed and it will set the default two equal sized columns. Or you can use different setting tags(which I will write at the end) to change the columns.

=== end-column ===: This states the end of the first column

=== multi-column-end: This states the end of the whole column region.
Whatever you write between the ‘multi-column-start’ and ‘end-column’ will stay in the first column. And the text between ‘end column’ and ‘multi-column-end’ will remain in the second column.
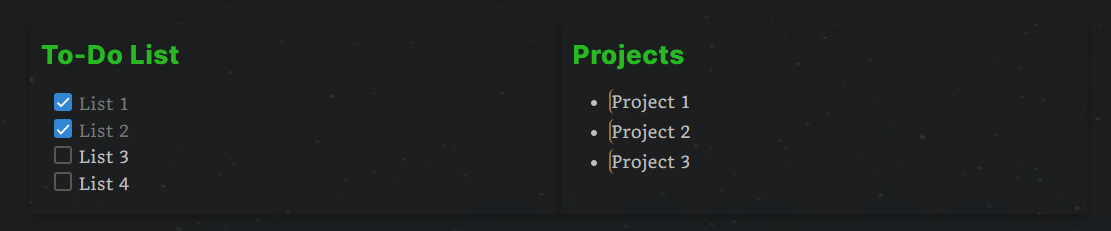
For example: Here’s the markdown format of a note in obsidian:
=== multi-column-start: ID_avy2
```column-settings
Number of Columns: 2
Largest Column: standard
border: off
```
## To-Do List
- [x] List 1
- [x] List 2
- [x] List 3 @completed(2025-01-01)
- [x] List 4 @completed(2025-01-01)
=== end-column ===
## Projects
- Project 1
- Project 2
- Project 3
=== multi-column-end
Here’s how it renders in preview mode:
If you want to create 3 columns you need to mention 3 columns in the columns settings and just need to add one more ‘=== end-column ===’.
Customizing the columns
Here are some settings that you can use to customize the column’s region:
-
Number of Columns: 2 or 3(This plugin doesn’t support more than 3 columns at the moment)
-
Largest column: Left, Right, middle, First, second, third
-
Border: disabled, off(It is enabled by default)
-
Shadow: Disabled, off(It is enabled by default)
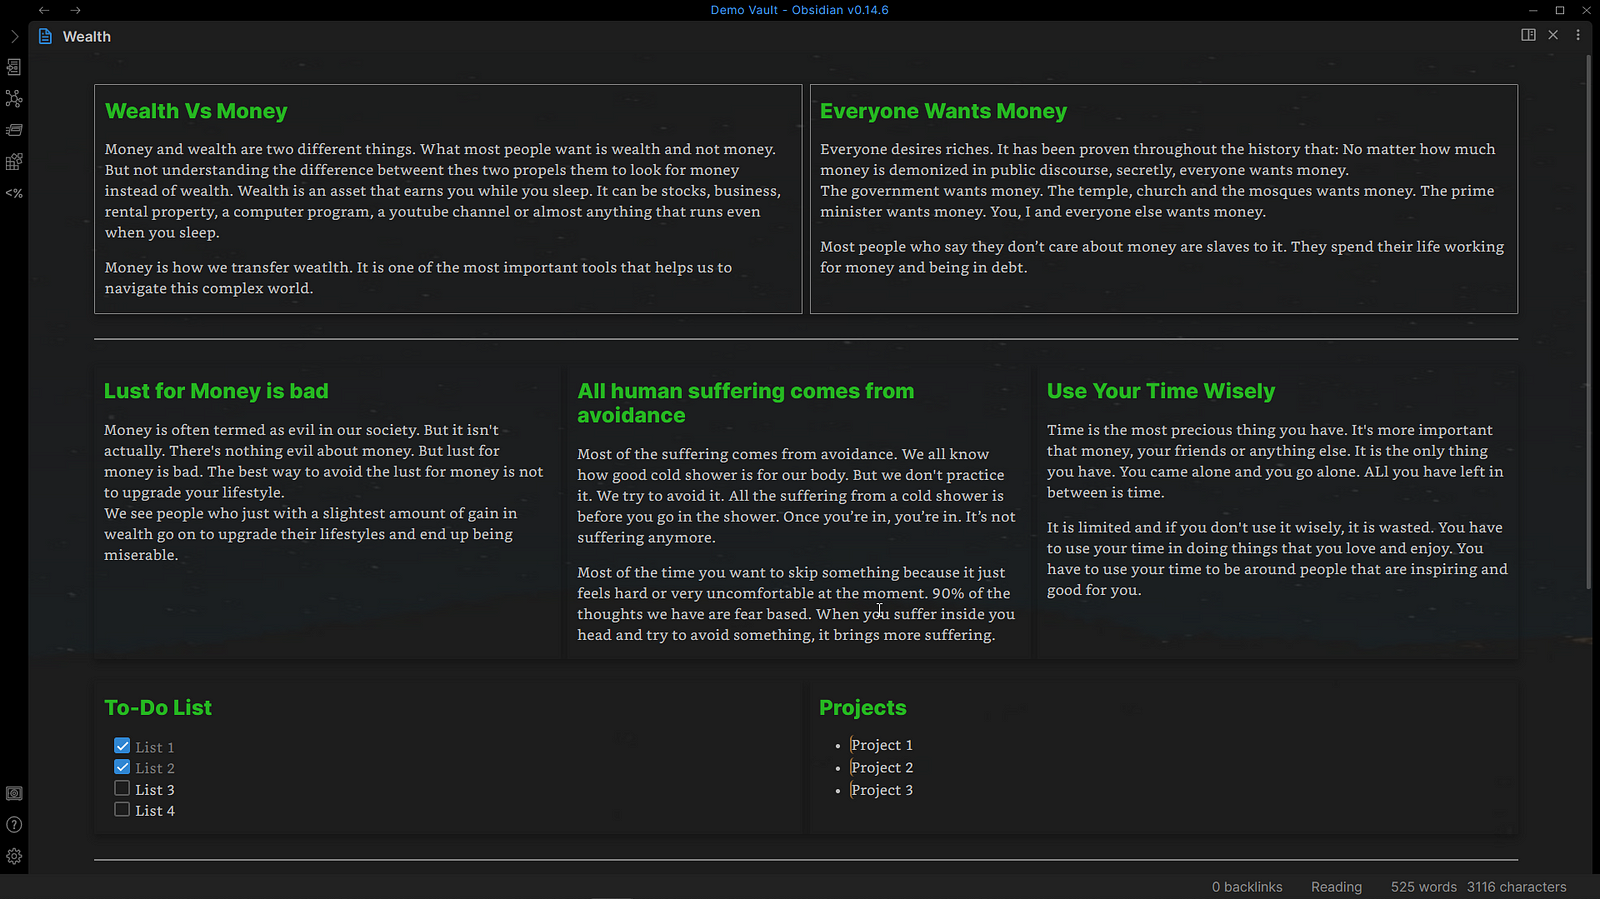
For demonstration purposes, here’s how I structured my notes on obsidian: